
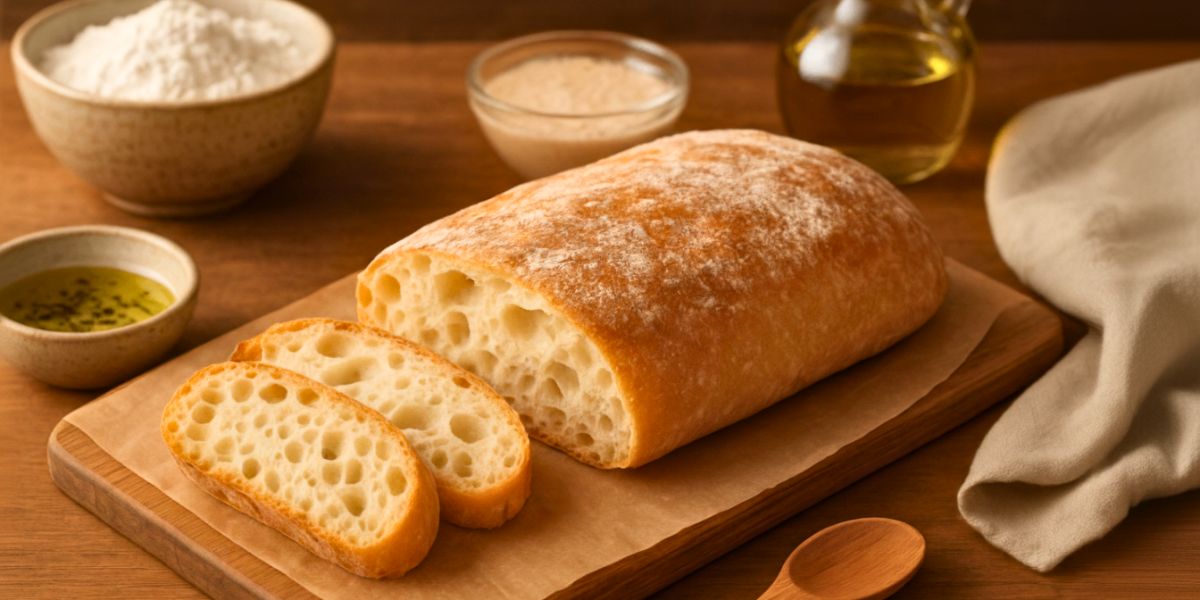
This Ciabatta Bread Recipe is simple, tasty, and perfect for beginners. Ciabatta is a soft Italian bread with a light and airy texture. It has a crispy crust and a fluffy inside.
You can enjoy it with soup, pasta, sandwiches, or simple butter. In this guide, I will show you how to make Ciabatta Bread step by step. The method is easy, and the results are amazing.
You also learn all the ingredients for Ciabatta Bread, helpful tips, and storage ideas. Follow this Ciabatta Bread Recipe once, and you will want to make it again and again.
The Secret Behind This Delicious
The secret of delicious ciabatta is high hydration dough. It means the dough has more water than usual. This creates a soft and airy texture. Another secret is gentle mixing.
You do not knead the dough too much. Slow fermentation also adds deep flavor. When the dough rises for many hours, it becomes light and tasty. A hot oven helps make the crust crispy. These simple steps give you soft and chewy ciabatta every time.

Recipe Card info
- Recipe Name: Ciabatta Bread
- Servings: 8
- Prep Time: 20 mins
- Cook Time: 25 mins
- Total Time: 3 hrs
- Course: Bread
- Cuisine: Italian
- Calories: 160 kcal per serving
Equipment List
- Large mixing bowl
- Wooden spoon
- Bench scraper
- Kitchen scale
- Clean towel
- Baking tray
- Parchment paper
- Oven
- Spray bottle with water (optional)
Ingredients You Need for Ciabatta Bread
- 3 ½ cups bread flour
- 1 ½ cups warm water
- 1 teaspoon active dry yeast
- 1 teaspoon sugar
- 1 ½ teaspoons salt
- 1 tablespoon olive oil
Instructions
1. Activate the Yeast
Mix warm water, sugar, and yeast in a bowl. Let it sit for ten minutes until bubbles appear.
2. Add the Flour
Add bread flour to the yeast mix. Stir slowly. Create a sticky and wet dough without dry spots.
3. Add the Salt and Oil
Add salt and olive oil. Mix gently. Do not knead hard. Keep the dough soft and sticky.
4. Rest the Dough
Cover the bowl with a towel. Let the dough rest for one hour until it grows and becomes puffy.
5. Stretch the Dough
Use wet hands. Gently stretch the dough upward. Fold it down. Do this three times.
6. Let It Rise Again
Cover again. Allow the dough to rise for another thirty minutes until it becomes airy.
7. Prepare the Baking Tray
Line the tray with parchment paper. Dust lightly with flour to prevent sticking.
8. Shape the Ciabatta
Transfer the dough gently. Do not press hard. Shape into a long rectangle.
9. Let It Proof
Cover lightly with a towel. Let the dough proof for forty minutes until slightly bigger.
10. Preheat the Oven
Heat the oven to 450°F. Place a tray inside to create steam if you like.
11. Add Steam Option
Spray water into the hot oven. This helps create a crispy ciabatta crust.
12. Bake the Bread
Bake for twenty-five minutes until golden brown and crispy on top.
13. Cool Before Cutting
Cool on a rack. Do not cut hot. Cooling helps the bread become soft inside.
Expert Tips & Variations
- Use bread flour for the best chewy texture.
- Keep the dough wet. Do not add extra flour. Ciabatta needs high hydration.
- Wet your hands before touching the dough. It prevents sticking.
- Do not knead the dough like regular bread. Ciabatta needs gentle mixing.
- Add rosemary or garlic for a flavored version.
- Replace some water with milk for a softer crumb.
- Add olives or sun-dried tomatoes for a fun twist.
- Use a hot baking stone for better rise and crust.

Nutrition Information
| Nutrient | Amount |
|---|---|
| Calories | 160 kcal |
| Carbs | 30 g |
| Protein | 5 g |
| Fat | 2 g |
| Fiber | 1 g |
Serving Suggestions
Ciabatta bread tastes amazing with many dishes. You can slice it and make sandwiches. Try it with butter, olive oil, or garlic spread. Serve it with soups like tomato or chicken soup. Eat with pasta, salads, or grilled meat. Use it for bruschetta topping with tomatoes and basil. It also tastes great with cheese and cold cutsStorage & Reheating Tips
Store ciabatta in a paper bag for one day. For longer storage, keep it in an airtight container. Do not store in the fridge because it becomes dry. Freeze slices for up to two months. Reheat in the oven at 350°F for ten minutes. This brings back the crispy texture. Do not microwave because it softens the crust.
FAQs about Ciabatta Bread Recipe
1. Why is my ciabatta dough so sticky?
Ciabatta dough must be very wet. This high hydration creates the airy texture. Sticky dough is normal and important. You should not add extra flour because it changes the texture. Using wet hands will help you handle the dough easily.
2. Can I make ciabatta without bread flour?
Yes, you can use all-purpose flour if needed. But bread flour gives better chew and structure. The bread may be lighter with all-purpose flour. If you use it, keep the water amount the same. The dough will still rise well.
3. How do I know when my ciabatta is fully baked?
Your ciabatta is ready when the crust becomes golden brown and firm. Tap the bottom gently. If it sounds hollow, it is baked. Let it cool before slicing. This step keeps the inside soft and fluffy.
4. Can I add herbs or flavors to this bread?
Yes, you can add herbs like rosemary, basil, or thyme. You can also add garlic or olives. Add these ingredients after the first rise. Fold them in gently so the dough stays airy and light.
5. Why does my ciabatta not have big holes inside?
Ciabatta needs a very wet dough and gentle handling. If you knead too much, the dough becomes tight. This stops big holes from forming. Also, allow full rising time. A slow rise helps create the open crumb.
Conclusion
This Ciabatta Bread Recipe is simple, soft, and perfect for new bakers. The steps are easy to follow, and the ingredients are basic. Now you know how to make Ciabatta Bread at home with confidence.
You also understand the ingredients for Ciabatta Bread, expert tips, and serving ideas. Make it once, and it will become your favorite homemade bread. Enjoy the crispy crust, soft inside, and rich Italian flavor. Happy baking!

Ciabatta Bread Recipe
Ingredients
- 3 ½ cups bread flour
- 1 ½ cups warm water
- 1 teaspoon active dry yeast
- 1 teaspoon sugar
- 1 ½ teaspoons salt
- 1 tablespoon olive oil
Instructions
Activate the Yeast
- Mix warm water, sugar, and yeast in a bowl. Let it sit for ten minutes until bubbles appear.
Add the Flour
- Add bread flour to the yeast mix. Stir slowly. Create a sticky and wet dough without dry spots.
Add the Salt and Oil
- Add salt and olive oil. Mix gently. Do not knead hard. Keep the dough soft and sticky.
Rest the Dough
- Cover the bowl with a towel. Let the dough rest for one hour until it grows and becomes puffy.
Stretch the Dough
- Use wet hands. Gently stretch the dough upward. Fold it down. Do this three times.
Let It Rise Again
- Cover again. Allow the dough to rise for another thirty minutes until it becomes airy.
Prepare the Baking Tray
- Line the tray with parchment paper. Dust lightly with flour to prevent sticking.
Shape the Ciabatta
- Transfer the dough gently. Do not press hard. Shape into a long rectangle.
Let It Proof
- Cover lightly with a towel. Let the dough proof for forty minutes until slightly bigger.
Preheat the Oven
- Heat the oven to 450°F. Place a tray inside to create steam if you like.
Add Steam Option
- Spray water into the hot oven. This helps create a crispy ciabatta crust.
Bake the Bread
- Bake for twenty-five minutes until golden brown and crispy on top.
Cool Before Cutting
- Cool on a rack. Do not cut hot. Cooling helps the bread become soft inside.
Notes
- Use bread flour for the best chewy texture.
- Keep the dough wet. Do not add extra flour. Ciabatta needs high hydration.
- Wet your hands before touching the dough. It prevents sticking.
- Do not knead the dough like regular bread. Ciabatta needs gentle mixing.
- Add rosemary or garlic for a flavored version.
- Replace some water with milk for a softer crumb.
- Add olives or sun-dried tomatoes for a fun twist.
- Use a hot baking stone for better rise and crust.

Sofia Lane is a food lover who loves cooking and sharing easy, tasty recipes. She believes in making cooking simple and fun for everyone. On DiveCrave, Sofia shares her favorite meals, desserts and treats that anyone can make at home.